 |
BLACKBOARD
SKETCHING
PLATE 3
The lesson
planned
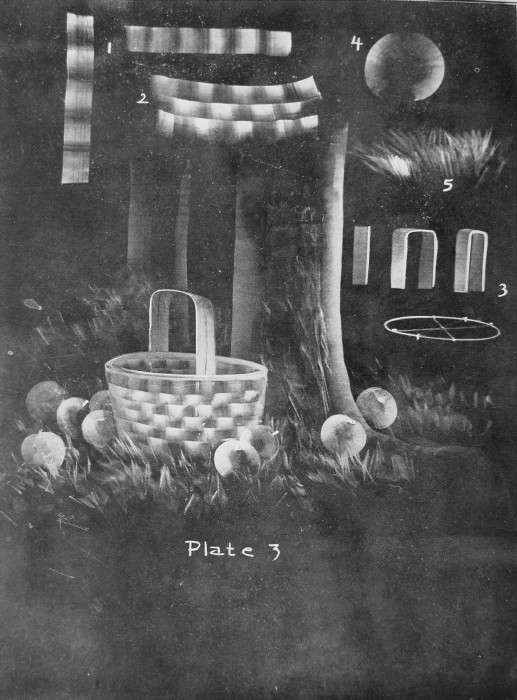
at illustration 3 is useful in a number of school lessons in the lower
grades.
I have seen it used in teaching reading in the first grade. In this
case, some
word from the lesson was written upon each apple, and the children were
asked
to see how many apples they could gather and put into the basket; in
other
words, to see how many words they could read. When a word was
recognized, it
was erased. Again, it has been successfully used in teaching number,
form, etc.
See also the ladder, plate 10.
Stroke 1
is made by
placing the chalk upon the board in a vertical position and then
drawing it
across the board, varying the pressure frequently so as to give the
effect seen
in the basket. The strokes at 2 are produced in the same manner. Here
the light
spots in the stroke are alternated, coming beneath the dark spots in
the stroke
above. Try a number of these in the curving direction suggested at 2.
In making
a sketch
of a basket, draw lightly the elliptical top, then add as many strokes
as are
necessary to give the desired depth, and lastly add the handle. Strokes
3, and
the ellipse below them, show the manner of producing this effect. Place
the
chalk horizontally at the top of the basket, decide where the handle
should end
at the opposite side, then draw upward with a heavy stroke, across the
top
lightly, then downward with a slight pressure. Keep the chalk in a
horizontal
position throughout the stroke. Add a line of accent to the nearest
edge of
the handle.
The tree
trunk back
of the basket is drawn with strokes 1 and 5, plate 2, the stroke being
curved a
bit at the lower end. The grass is added by the use of stroke 5, which
is made
by using a short piece of chalk, and by moving the hand rapidly up and
down. A
little accent may be used occasionally.
In drawing
the apples study stroke 4. These are
made like those on plate 2, by accenting with the end of the chalk. Use
a very
short curving stroke, first toward the left, then toward the right. Add
stems,
etc., with the point of the chalk.
|