
Web
and Book design,
Copyright, Kellscraft Studio 1999-2018 (Return to Web Text-ures) |
 (HOME)
|
AN
OAK-BOUND CEDAR CHEST 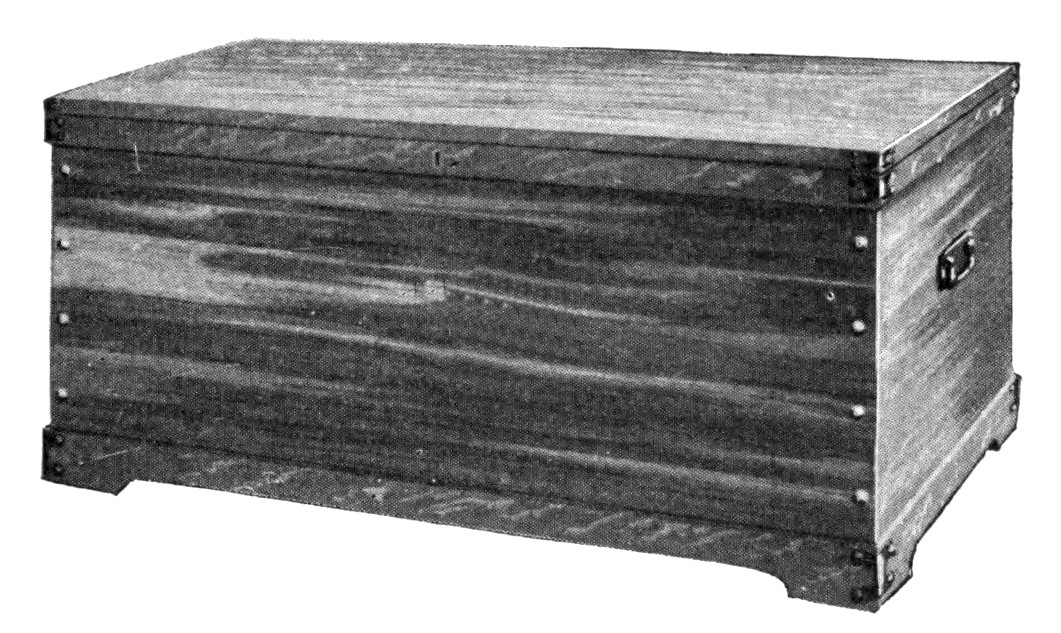 This cedar chest for storing unused bedding or furs is not a difficult thing to make and when made, the hard oak binding takes the wear and protects the softer cedar so that the chest ought to serve several generations. Order the stock as follows: CEDAR 2 top and bottom pieces,7/8 by 16 1/2 by 34 1/2 in., S-2-S. 2 sides, 7/8 by 18 7/8 by 34 1/2 in., S-2-S. 2 ends, 7/8 by 18 7/8 by 14 1/4 in., S-2-S. OAK 2 overhanging top pieces, 1 by 1 by 36 1/2 in., S-4-S. 2 overhanging top pieces, 1 by 1 by 18 1/2 in., S-4-S. 2 lock and hinge rails. 1 by 2 1/2 by 36 1/2 in., S-2-S. 2 lock and hinge rails, 1 by 2 1/2 by 18 1/2 in., S-2-S. 2 base pieces, 1 by 3 1/4 by 36 1/2 in., S-2-S. 2 base pieces, 1 by 3 1/4 by 18 1/2 in., S-2-S. Specify thoroughly seasoned Tennessee red cedar and plain sawed white oak and have the different pieces millplaned and sandpapered as indicated in the stock-bill. This bill allows 1/2 in. extra on the length and the width of each piece for "squaring up" 9f all pieces except those marked to be surfaced on four sides. 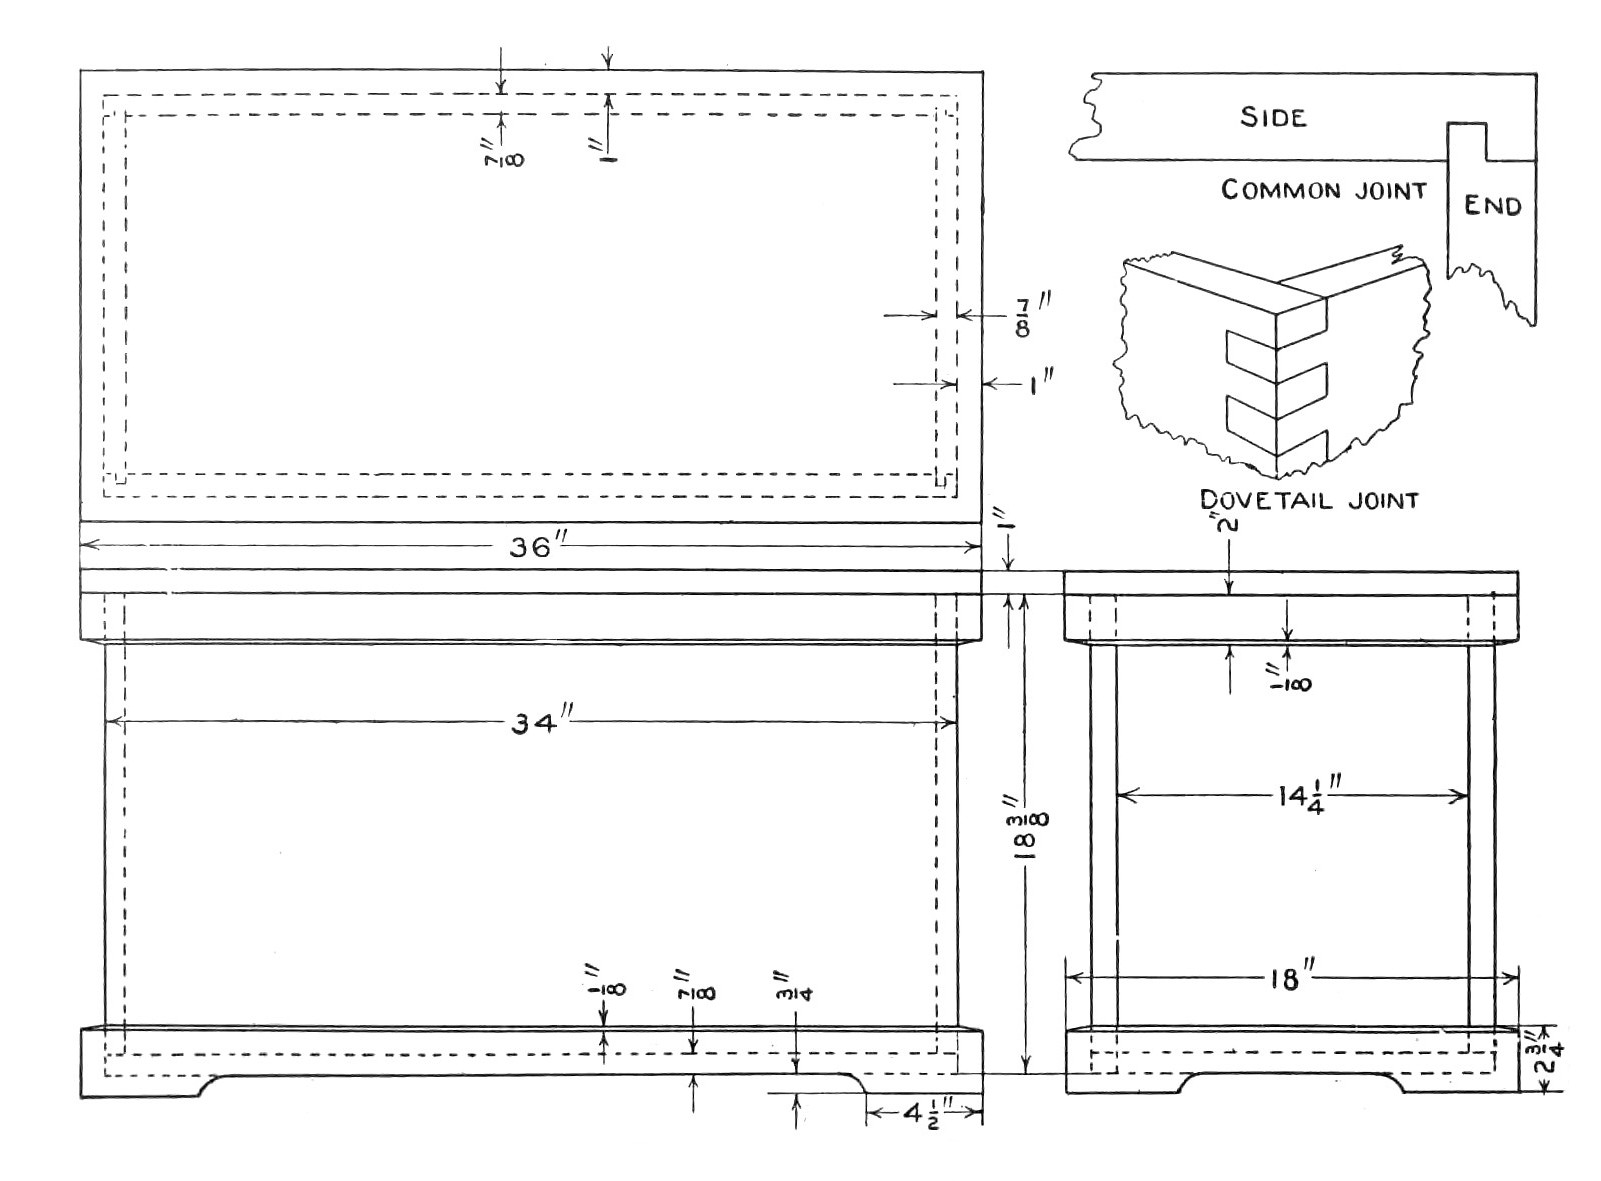 Details of Cedar Chest
Begin by squaring the sides and ends to size. Probably the best joint for the corners is the dovetail. If the worker is not experienced in woodworking, some of the more simple joints will do. It will be noted that the drawing and stock-bill call for the simplest form of joint, that in which the sides of the chest lap over the end. For the dovetail joint it will be necessary to add 2 in. more to the length of the end pieces, making them 16 3/4 in. each in the rough. Having got the sides and ends ready, fasten them together. The perspective shows the sides fastened to the ends with ornamental headed nails. Common nails are first used, being equally spaced, and the ornamental heads are afterwards placed so as to cover their heads. Next square the bottom and nail it to the parts just assembled. Square the top to the same size. The base stuff is squared on one edge only. The second edge — the upper one — is to be beveled or sloped 1/8 in. to facilitate dusting and for appearance sake. Fit these base pieces to place, mitering the joints. Before fastening the parts to the chest proper, gauge a line 3/4 in. from the lower edge and to a point 4 1/2 in. from each end, cut out to this line and shape the base as shown in the drawing. Use finishing nails for fastening the base to the chest. The heads should be "set" so they may be covered later with a putty colored to match the finish. In a similar manner plane up, cut and fit the back and hinge rails. These rails should be kept a "scant" 1/8 in. below the top edges of the chest proper. The overhang of the lid fits down over in such a way as to form a dust-proof joint between lid and chest proper. The overhang of the lid of 1 in. by 1 in. stock may next be mitered, fitted and nailed to the lid. Thoroughly sandpaper all parts not so treated and finish as follows: Put on all the oak pieces, two coats of natural paste filler. This is best done before they are fastened in place. Directions will be found on the cans in which the filler is kept. The red of the cedar may be heightened by applying a mahogany stain made of Bismark brown aniline and boiling water, in the proportion of 3 qt. of water to 1 oz. of aniline. If applied hot the stain will enter the wood better. When dry, sandpaper lightly with No. 00 paper, both this and the oak-filled pieces. Fasten the oak pieces in place and give the whole exterior a very thin coat of shellac. After this has hardened, apply two coats of wax. Wax comes in paste form and is to be applied with a cloth very sparingly. Allow it to stand five or ten minutes then rub briskly with a soft dry cloth to polish. The first coat is allowed to stand 24 hours before the second is applied in a similar manner. Another finish, known as an egg-shell gloss shellac finish, is obtained by omitting the wax and instead applying from two to five more coats of shellac. Allow each coat 24 hours in which to harden, and rub each hardened coat to a smooth finish, using curled hair, or fine steel wool, or fine oiled sandpaper, before applying the next. The metal reinforcements for the corners can be bought at a hardware store, as can the lock, hinges, and handles. These parts are applied in the usual manner — butt hinges being used. If well made, the chest is practically airtight. The interior is all of red cedar, while the effect of the exterior in combining the light oak and the red cedar is striking. |
 Click the book image to turn
to the next Chapter.
Click the book image to turn
to the next Chapter.