
Web
and Book design,
Copyright, Kellscraft Studio 1999-2010 (Return to Web Text-ures) |
 (HOME)
|
| CHAPTER XIII
HOW TO CANE CHAIRS SMALL, square frames of wood with holes bored in them, at intervals of about an inch, and having two or more round pegs to fit the holes, are sold by dealers in kindergarten supplies. These are excellent for the beginner to use, instead of a chair seat, while he is learning how to cane. The cane is sold at basket factories and is usually designated as coarse, medium, fine or fine fine. It comes in long twists, like the rattan, and is pulled out in the same way from the loop end. Two patterns of caning are given, a simple one on a frame and one that is more elaborate on a chair seat.
A square frame with 2 or 3 wooden pegs, 8 or so lengths of fine cane. The frame, with its smooth side up, is held on the lap of the worker, with its upper edge resting on a table or chair at a convenient height. If, as is the case with the frame in the picture, there is an even number of holes across the top and bottom, say sixteen, the worker counts from the left side eight holes at the bottom, and eight at the top, from the left side. This finding the approximate centre must always be the first step. A length of cane, previously wet for a few minutes, is drawn up through the hole in the centre of the lower edge of the frame and down through the corresponding hole in the top edge, where an end about two and a half inches long is left and a peg put in to hold it. The long end of cane at the lower edge is now brought up through the next hole on the right, taking care not to twist it; here a peg is put in and the cane is brought down through the first hole on the right of the centre at the top, where the peg (taken from the previous hole) is put in to hold it in place. The cane is brought up through the next hole to the right and so on to the right edge. It should not be put through the hole next the edge, as that would bring it over the wood and at the same time cover the holes, two important things to be avoided. The cane should not be drawn absolutely taut, for when the finishing row of diagonal weaving is put in it tightens the work and if it is already strained the last weaving will be difficult. The ends are fastened off on the wrong side. Each is brought twice through the next loop, see Fig. 31, creasing the cane sharply so it will hold. Another length of cane is started at the left of the centre and brought through the holes from there to the left side of the frame, in the same way as on the right. The end, if it is long enough, should be left to work in on another row. The frame is now filled with vertical lines of cane. A row of horizontal lines is next put in, in the same way; starting from the centre and working out to the edge on the right and then out to the edge on the left. This covers the frame with a network of squares. Diagonal lines are then begun, starting from the lower left-hand corner and running a length of cane to the upper right-hand corner (the long ends left from the first rows may be used instead of starting new lengths of cane); the work being done as before, first to the right and then to the left, till the frame is filled with a set of these diagonal lines, being careful, however, not to run a line over the wood at the corners. In the fourth row the lines run diagonally, from the lower right-hand corner to the upper left-hand corner, but in this row the cane is woven; first under a cross then over a single cane, under a cross and over a single cane (see Fig. 32). Each succeeding line is woven in the same way, under the crosses and over the single canes. If there is a professional chair caner in your neighborhood, it will help you to watch him at work, for caning is a process best learned by seeing it done.
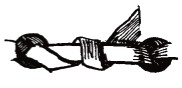 FIG. 31 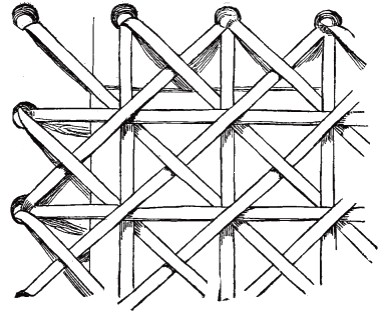 FIG. 32
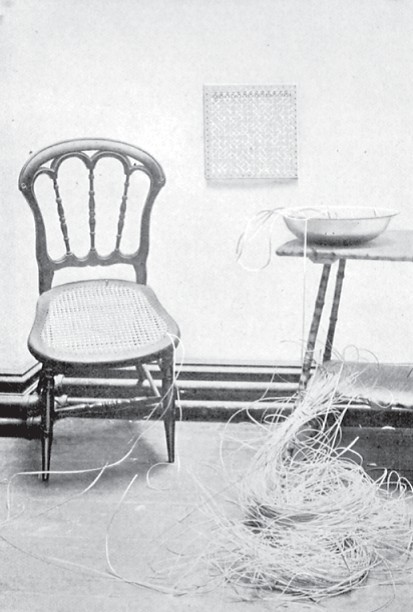
Materials: - A chair, A bundle of fine cane, A length of binding, 2 or 3 pegs. The more elaborate pattern with octagonal meshes, which is shown in the picture, is familiar to everyone. In fact, it is so generally used that if you are going to re-cane a chair you will very likely cut out a seat made in the same pattern. If so, cut it close to the wood all around and you will have a guide to help you in making the new seat. A foot-stool to sit on is a necessity, otherwise caning will be a back-breaking process. Seated on this stool the worker tips the front of the chair seat forward until it rests on his lap, and he is ready to begin. As in the caning previously described the centre must first be found, and the lines of cane run vertically across the seat. They should be left quite loose, or else at the sixth row of caning the work will be slow and difficult. One beginner made his first rows so tight that, when he came to the last row, he broke the frame of his chair trying to weave in the last lines of cane. The next set of canes are brought across the seat horizontally, these are followed by a vertical set of canes passing over the first vertical canes, through the same holes. The fourth set of canes is woven horizontally across, first over one of the upper vertical canes, then under the lower vertical one, pulling the upper vertical cane in each group to the right and going over or under as the case may be. The chair seat is now filled with weaving which looks like Fig. 33. The next lines of cane run diagonally, from the lower left-hand corner to the upper right-hand corner of the seat. They go under the vertical pairs, and over the horizontal pairs to the right and above the vertical ones (see Fig. 34). The diagonal lines of cane which complete the pattern, go from the lower right-hand corner of the seat to the upper left-hand corner and pass always over the vertical groups and under the horizontal ones (see Fig. 34). In putting in the diagonal lines of cane it will often be found advisable to have two parallel lines begin or end in the same hole, especially at the corners. Look at some chair seat made in this pattern, and you will see an example. When this is done, the end of cane must either be brought through the loop next to it, before coming out through the same hole it went in, or if it is a short end it is fastened off here and another started. In caning each chair there are small problems of this kind which the worker's common sense and sense of proportion will aid him to settle for himself.
CANING IN A FRAME AND ON A CHAIR Two patterns of caning are illustrated in this plate. The simple cross pattern is shown in the frame on the wall, the more elaborate octagonal pattern on the chair When the last diagonal lines have been woven in the work is completed by covering the holes with a row of binding, as follows: A length of binding (cane which is wide enough to cover the holes in the edge, and is sold for the purpose) is brought up through a hole, at the right or left-hand upper corner of the seat, and laid along over the holes at the edge, where it is couched with a piece of fine rattan which is run up through every other hole, across the binding and back again. The process is repeated at every second hole on the right. When the circuit of the edge has been made, the binding is brought down through the hole where it started and there ended off.
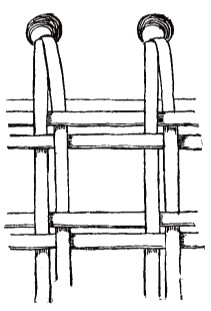 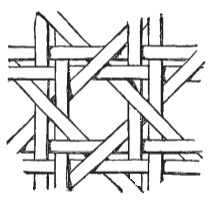 FIG. 33 FIG. 34 |
 Click the book image to turn
to the next Chapter.
Click the book image to turn
to the next Chapter.